
7 Knee-Strengthening Exercises and a Starter Plan
Try seven knee exercises with clear form cues, a cautious starter schedule, progression steps, pain checks, and signs that require medical care.
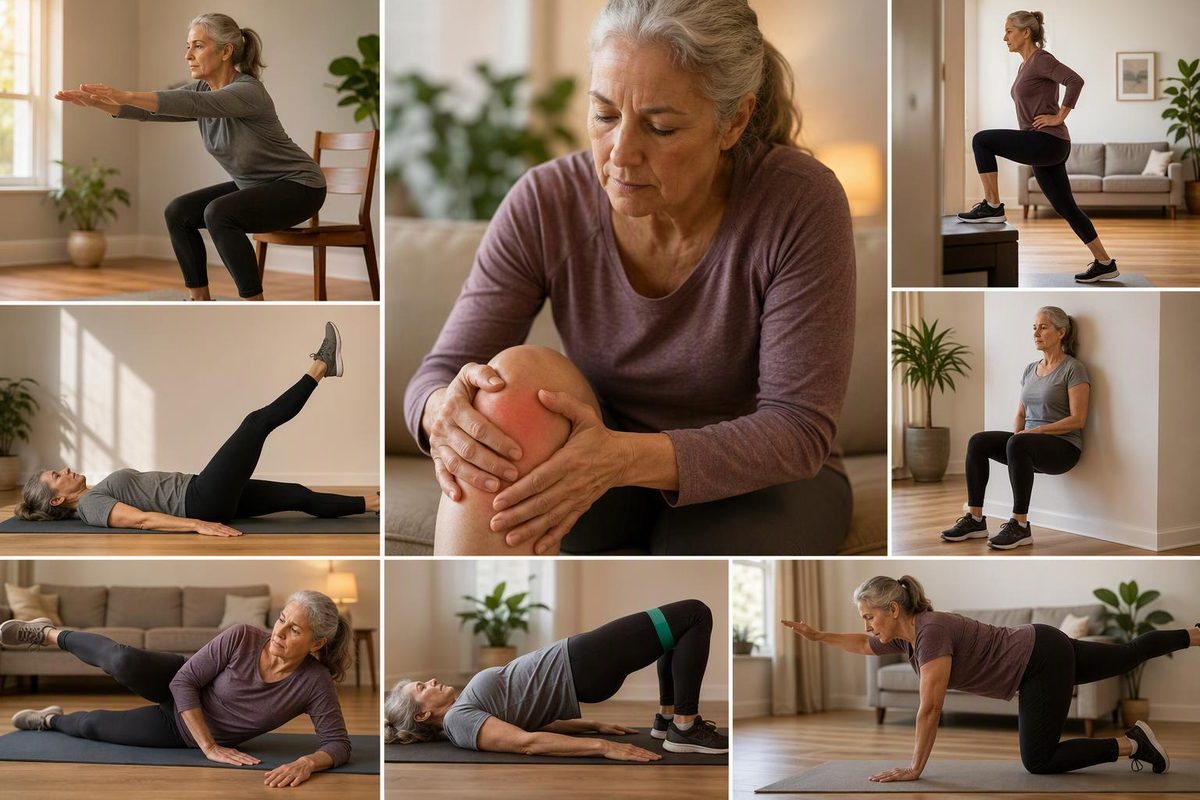
You cannot strengthen the knee joint itself like a muscle, but you can strengthen the quadriceps, hamstrings, glutes and other hip muscles that control the leg. For a cautious start, choose four or five of the exercises below and perform one set of 8 to 10 controlled repetitions, two or three non-consecutive days per week.
There is no single best routine for every kind of knee pain. Exercise is a core treatment for knee osteoarthritis, but it should be tailored to the person, according to NICE guidance. For pain around the kneecap—often called patellofemoral pain—a 2024 best-practice guide recommends knee-targeted exercise, with hip-targeted exercise added when appropriate and supported by education (British Journal of Sports Medicine).
The routine is intended for an adult with gradual-onset, non-urgent knee symptoms who can walk and bear weight. It is not a rehabilitation protocol for a recent injury or operation.
Choose your available setup and target muscles to narrow the exercise list.
Find Exercises That Fit Your Setup
Filter the seven options by equipment or position and the muscles they emphasize.
| Exercise | Setup | Works |
|---|---|---|
| Sit-to-stand | Chair | Quadriceps, glutes |
| Supported mini squat | Counter | Quadriceps, glutes, hamstrings |
| Seated knee extension | Chair | Quadriceps |
| Straight-leg raise | Floor | Quadriceps |
| Bridge | Floor | Glutes, hamstrings |
| Side-lying leg raise | Floor | Outer hip |
| Low step-up | Step | Quadriceps, glutes |
Starter dose: Choose four or five exercises. Perform one set of 8 to 10 controlled repetitions, two or three non-consecutive days per week.
Source: Exercise roles and starter dose summarized from the article; warm-up and frequency guidance are based on the cited AAOS knee conditioning program.
Before You Start
Warm up with 5 to 10 minutes of easy walking or stationary cycling, as recommended in the AAOS knee conditioning program.
For your first session, choose four or five exercises and do one set of 8 to 10 controlled repetitions. Work both sides where applicable. Try the routine two or three non-consecutive days per week. AAOS also suggests two or three days per week for maintaining knee strength and range of motion, although the right dose depends on the condition and exercise.
Use a chair, counter or railing for balance. Move slowly enough that momentum does not take over.
Seven Exercises for Stronger Knee Support
1. Sit-to-Stand
Works: Quadriceps and glutes
Useful for: Getting up from chairs and progressing toward squats
- Sit near the front of a firm chair with your feet about hip-width apart.
- Lean forward slightly from the hips.
- Press through both feet and stand.
- Push your hips backward and lower yourself to the chair under control.
Make it easier by using a higher chair or pushing lightly through the armrests. Make it harder by tapping the chair without resting before standing again.
2. Supported Mini Squat
Works: Quadriceps, glutes and hamstrings
- Stand with your feet about hip- to shoulder-width apart and hold a counter.
- Push your hips slightly backward and bend your knees only as far as feels manageable.
- Keep your heels down and your knees pointing roughly in the same direction as your toes.
- Return to standing.
A deeper squat is not automatically better. In a laboratory study of 20 healthy adults, exercises involving greater knee bend tended to place more load through the joint between the kneecap and thigh bone (Orthopaedic Journal of Sports Medicine).
That finding can help explain why reducing squat depth sometimes makes front-of-knee symptoms more manageable. It does not establish one safe squat depth for everyone or show how an injured knee will respond.
3. Seated Knee Extension
Works: Quadriceps
- Sit tall in a chair with both feet on the floor.
- Slowly straighten one knee without swinging the leg.
- Briefly tighten the front of the thigh.
- Lower the foot under control and change sides.
When unweighted repetitions become easy, add a light ankle weight or resistance band gradually. For more detail on how this movement differs from a hamstring curl, see leg extension vs leg curl.
4. Straight-Leg Raise
Works: Quadriceps with little knee movement
- Lie on your back with one knee bent and the other leg straight.
- Tighten the thigh of the straight leg.
- Lift that leg until it is roughly level with the opposite thigh.
- Pause, then lower slowly without letting the knee bend.
If you cannot keep the knee straight, first practice tightening the thigh while the leg rests on the floor. These form cues are consistent with the American Physical Therapy Association’s ChoosePT instructions.
5. Bridge
Works: Glutes and hamstrings
- Lie on your back with your knees bent and feet flat.
- Tighten your buttocks and lift your hips.
- Stop before your lower back arches.
- Pause, then lower under control.
Keep your feet, knees and hips aligned rather than letting the knees drop inward or outward.
6. Side-Lying Leg Raise
Works: Outer hip muscles
- Lie on your side with the working leg on top and straight.
- Keep the top toes facing forward.
- Lift the leg without rolling your pelvis backward.
- Pause and lower slowly.
The leg does not need to lift high. This movement adds hip work to the knee-focused exercises in the routine.
7. Low Step-Up
Works: Quadriceps and glutes in a stair-like movement
- Put one whole foot on a low, stable step and hold a railing.
- Shift your weight over that foot and step up.
- Straighten the working leg without snapping the knee backward.
- Lower slowly and complete the set before changing sides.
Start with a low step. Increase its height only after you can control both the upward and downward phases. If stairs are your main trigger, pain going up or down stairs explains which details may help guide your next step.
Progress One Variable at a Time
Progress the routine in this order:
- Add repetitions, up to about 12 to 15.
- Add a second and then a third set.
- Increase the movement range slightly.
- Add light resistance.
- Move to a harder variation, such as a lower chair or higher step.
The final few repetitions should require effort while your form remains controlled. Do not increase depth, resistance and total repetitions in the same session.
A practical progression might mean adding repetitions to the sit-to-stand while leaving the chair height unchanged. Once those repetitions feel controlled, add a set or use a slightly lower chair rather than changing everything together.
Use Symptoms to Adjust the Dose
There is no universal pain cutoff for every knee condition. NICE advises people with osteoarthritis that pain can initially increase with therapeutic exercise, whereas the AAOS conditioning program says its exercises should not cause pain. Follow any condition-specific instructions you have received.
As a cautious home rule, stop an exercise if it causes sharp pain, new catching or a feeling that the knee may give way. Reduce the range or number of repetitions if symptoms rise substantially and do not settle after the session, disturb sleep or interfere with activity the next day.
That next-day response approach is also used by an NHS musculoskeletal service for meniscal knee pain, although its numerical pain threshold should not be treated as a rule for every diagnosis.
If symptoms repeatedly flare, return to an easier variation. That could mean using a higher chair, making the mini squat shallower, removing resistance or reducing the step height. A physical therapist can match the exercise and dose to the likely cause of the symptoms.
When a Home Routine Is Not Appropriate
Seek prompt medical advice rather than testing these exercises if the knee is badly swollen or deformed, you cannot bear weight or move it, it locks or gives way, or it is hot and red while you have a fever or chills. These are among the urgent warning signs in NHS knee-pain guidance.
Arrange an assessment after a specific injury, for rapidly increasing swelling or when pain is not improving. After surgery or a diagnosed fracture, ligament injury or tendon rupture, follow the loading and movement restrictions from your treating clinician instead of a generic strengthening plan.