
Knee Brace Size Charts With Product-Specific Rules
A DonJoy retailer guide and POD Active say to choose the larger size, while Old Bones Therapy tells users of its chart to size down.
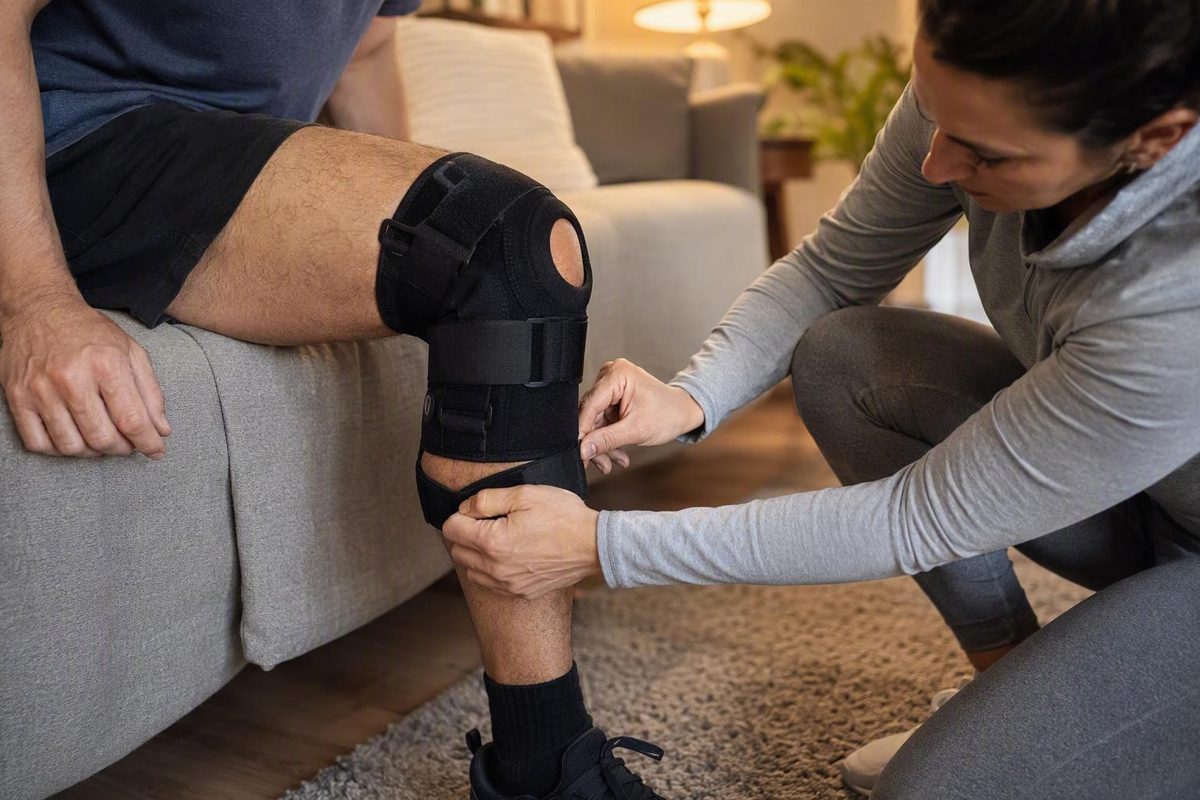
A knee brace size chart is useful only when it belongs to the exact brace you intend to buy. There is no dependable universal conversion from leg circumference to Small, Medium, Large, or another size label.
Brands—and sometimes individual models from the same brand—use different measurement points, postures, units, and rules for measurements that fall between sizes. A structured brace might require thigh, knee-center, and calf measurements. A compression sleeve might use knee circumference plus a calf check. Another brace might be sized by knee width.
The practical method is simple:
- Identify the exact product.
- Measure exactly as its instructions specify.
- Apply its boundary or between-size rule.
- Check the fit during ordinary movement.
Every numerical chart below is a product- or brand-specific comparison example, not a universal knee brace size chart. The retailer-provided DonJoy and Breg examples have not been verified against a current manual for every model and should not be used to order until matched to the exact product.
Why One Universal Knee-Brace Size Chart Does Not Work
No single Small-to-XXXL chart applies reliably to every knee brace. Identical labels can represent different measurements across brands, models, and brace styles. Even within one brand, the required measurements may change from one product to another.
Three common systems illustrate the differences:
- Three-point circumference systems: Some structured braces use measurements around the thigh, knee center, and calf. The thigh and calf may be measured at specified distances above and below the midpoint of the kneecap.
- Knee-focused systems: Some compression sleeves use knee-center circumference, sometimes with a separate calf measurement.
- Single-point or width systems: Certain products use one circumference above or below the kneecap, while others use knee width.
The chart on the exact product page or in the current product manual takes priority over a general brand chart. Retailer guidance also warns that requirements can vary by manufacturer and individual model.
Off-the-shelf charts should not be used to size a custom brace.
Before consulting a chart, confirm:
- Brand
- Exact model name and version
- Brace style: sleeve, wraparound, hinged, rigid, specialty, or custom
- Required measurement location
- Required posture: straight, relaxed, weight-bearing, or slightly bent
- Unit: inches, centimeters, or millimeters
- Between-size rule: size up, size down, or request help
- Whether both legs should be measured
- Whether the chart is current and specific to the product
Do not choose Medium merely because another brace you own is a Medium. Treat the label only as the name of a row in that product’s chart.
How to Measure Your Leg for a Knee Brace
Start with:
- A flexible cloth or tailor’s tape
- Bare skin or fitted clothing, as permitted by the product instructions
- A stable place to stand or sit in the required posture
- A washable skin marker, removable tape, or another safe way to mark specified distances
The correct posture is not universal. Follow the instructions for the exact product instead of choosing whichever stance feels easiest.
Finding the knee-center reference
Wrap the tape around the leg at that level and keep it horizontal.
Do not assume that “around the knee” always means mid-patella. A product may instead specify the widest part of the joint, directly beneath the kneecap, or a fixed point above it.
Measuring for a three-point system
For a brace that expressly requires knee-center, thigh, and calf circumferences:
- Knee center: Measure around the knee at the midpoint of the kneecap.
- Thigh: Measure at the specified distance above knee center.
- Calf: Measure at the specified distance below knee center.
Some DonJoy-style instructions specify 6 inches above and below knee center. Other instructions may state 15 centimeters, which is approximately—but not exactly—the same distance. Use the unit and distance printed for the exact product rather than converting the landmark yourself. General DonJoy Store guidance describes knee-center, thigh, and calf measurements and a stable stance with the feet apart and knees slightly bent, while also directing readers to the applicable model chart (DonJoy Store measuring guidance).
At every measurement point:
- Keep the tape flat.
- Keep it level rather than allowing it to rise or fall behind the leg.
- Pull it snug enough to remove slack, but not into the tissue.
- Record the displayed value instead of rounding toward a preferred size.
- Repeat the measurement before checking the chart.
Measuring twice can reveal that the tape moved, the landmark was incorrect, or the first reading was misread.
Posture and landmarks vary by product
The differences are substantial enough that one measuring routine should not be transferred between products:
- POD Active: Measure while weight-bearing with the leg fully straight. Circumference is measured directly beneath the kneecap with a soft tape or accurately marked string. Knee width is measured across the center of the kneecap using calipers or the brand’s sizing tool (POD Active sizing guide).
- SBD knee sleeves: Keep the leg straight and the muscles relaxed. Measure around the center of the kneecap and separately around the thickest part of the calf (SBD knee-sleeve guide).
- Old Bones Therapy: Measure leg circumference 4 inches above the top of the kneecap (Old Bones Therapy size chart).
- General DonJoy guidance: A stable stance with slightly bent knees may be used, subject to the exact model’s instructions.
If a POD Active product permits string for circumference, mark the overlap, lay the string flat, and measure the marked length. Do not use that method for knee width; POD specifies calipers or its sizing tool.
A simple record can prevent measurements from being mixed between products:
| Product and model | Required posture | Measurement location | Left leg | Right leg | Inches | Centimeters | Repeat reading |
|---|---|---|---|---|---|---|---|
| Example brace | As instructed | Knee center | |||||
| Example brace | As instructed | Fixed point above knee | |||||
| Example brace | As instructed | Fixed point below knee |
Fill in the product, posture, and location before measuring. If you are comparing two models, use separate rows because their landmarks may not match.
DonJoy Off-the-Shelf Size Chart Example
The table below is a third-party retailer’s general chart for DonJoy off-the-shelf braces. It is not manufacturer verification for every current DonJoy model and should not be used to order until the measurements and ranges are confirmed on the exact product page or manual.
For this example, the thigh is measured 6 inches above knee center, the knee at mid-patella, and the calf 6 inches below knee center. The retailer instructs buyers who are genuinely between sizes to choose the larger size (SourceOrtho’s DonJoy off-the-shelf guide).
Retailer-published comparison example—not a universal or model-verified ordering chart
| Size | Thigh, 6 in above knee center | Knee center at mid-patella | Calf, 6 in below knee center |
|---|---|---|---|
| XS | 13–15.5 in | 12–13 in | 10–12 in |
| S | 15.5–18.5 in | 13–14 in | 12–14 in |
| M | 18.5–21 in | 14–15 in | 14–16 in |
| L | 21–23.5 in | 15–17 in | 16–18 in |
| XL | 23.5–26.5 in | 17–19 in | 18–20 in |
| XXL | 26.5–29.5 in | 19–21 in | 20–22 in |
| XXXL | 29.5–32 in | 21–23 in | 22–24 in |
Worked DonJoy example
Suppose the repeated measurements are:
- Thigh: 20 inches
- Knee center: 14.5 inches
- Calf: 15 inches
All three values fall within the retailer-listed Medium ranges. Medium is therefore the internally consistent result under this particular example.
That conclusion does not establish Medium as the correct size for every DonJoy brace. If the exact model uses different landmarks, ranges, or fitting rules, its own instructions control.
The retailer’s displayed XXXL metric entries do not align consistently with the corresponding inch ranges, so they are not reproduced here as verified centimeter values. Readers measuring in centimeters should consult the current chart for the exact product rather than relying on the disputed metric row or treating an independent conversion as manufacturer-published data.
If the thigh falls in one row but the knee or calf falls in another, this table does not establish which measurement controls. Do not average the values or select a size solely from knee circumference. Ask the manufacturer, seller, authorized dealer, or qualified fitter for the rule that applies to the exact model.
The instruction to choose the larger size also belongs only to the cited retailer guide. It should not be transferred to another brand or an unlisted DonJoy model.
Other Structured-Brace Systems: Breg and POD Active Examples
Breg and POD Active show two more ways structured-brace sizing can differ. Keep the systems separate: their measurement points and labels are not interchangeable.
Retailer-provided general Breg example
The following retailer-published general Breg table uses thigh and calf measurements taken approximately 6 inches above and below mid-patella. It does not include a knee-center column. The retailer also cautions that individual models may have different requirements (OrthoBracing’s general sizing guidance).
Retailer-published comparison example—not a current, model-specific ordering chart
| Size | Thigh, approximately 6 in above mid-patella | Calf, approximately 6 in below mid-patella |
|---|---|---|
| XS | 13–15 in | 10–12 in |
| S | 15–18 in | 12–14 in |
| M | 18–19.5 in | 14–15 in |
| M+ | 19.5–21 in | 15–16 in |
| L | 21–24 in | 16–18 in |
| XL | 24–27 in | 18–20 in |
| XXL | 27–30 in | 20–23 in |
For example, a 20-inch thigh and a 15.5-inch calf fall within the retailer-listed M+ ranges. This illustrates how the table works; it does not confirm that M+ is correct for every Breg brace.
The M+ row and two-input structure are enough to show why these labels cannot be translated directly to the three-input DonJoy example. Confirm the exact Breg model before ordering.
POD Active knee-width and circumference systems
POD Active permits sizing from either of two product-specific inputs:
- Knee width: Across the center of the kneecap, measured with calipers or a POD sizing tool
- Knee circumference: Directly beneath the kneecap, measured with a soft tape or accurately marked string
Both are measured while weight-bearing with the leg fully straight. POD says knee shape can affect fit, recommends the larger size when between sizes, and recommends fitting or adjustment by a suitable healthcare provider or local dealer (POD Active sizing guide).
The published inch and millimeter circumference scales are shown separately below because several paired endpoints are not mathematically exact conversions. Do not convert between the columns or assume that an inch reading and a millimeter reading will always produce the same result. Use the unit requested by the current selector for the exact product and request clarification if the two scales conflict.
POD Active published circumference scales
| Size | Published circumference in inches | Published circumference in millimeters |
|---|---|---|
| Youth/Youth Tall | 10.80–11.60 in | 275–295 mm |
| X-Small | 11.60–12.60 in | 295–320 mm |
| Small | 12.60–13.40 in | 320–340 mm |
| Medium | 13.40–14.10 in | 340–360 mm |
| Large | 14.10–14.80 in | 360–380 mm |
| X-Large | 14.80–15.80 in | 380–402 mm |
| 2X-Large | 15.80–16.80 in | 402–420 mm |
| 3X+ | 16.80–17.40 in | 420–442 mm |
POD Active published knee-width ranges
| Size | Width across center of kneecap |
|---|---|
| Youth/Youth Tall | 3.46–3.70 in |
| X-Small | 3.70–4.01 in |
| Small | 4.01–4.25 in |
| Medium | 4.25–4.48 in |
| Large | 4.48–4.72 in |
| X-Large | 4.72–5.00 in |
| 2X-Large | 5.00–5.27 in |
| 3X+ | 5.27–5.55 in |
Using POD’s millimeter scale, a circumference of 350 mm, measured directly beneath the kneecap in the required straight, weight-bearing posture, falls in the Medium range.
Do not combine a POD knee-width result with a DonJoy or Breg table. Also confirm that the exact POD model is offered in the resulting size. Unclear product-to-size mappings should not be reconstructed by assumption.
Knee-Sleeve Charts Use Different Measurement Rules
A compression-sleeve chart should not automatically be used for a hinged, rigid, structured, or custom brace. Sleeves may use different landmarks and product-specific compression preferences that do not apply to a frame or hinge system.
Old Bones Therapy: one point above the knee
Old Bones Therapy illustrates a one-point system. Its chart instructs the user to measure leg circumference 4 inches above the top of the kneecap. It also says to size down when between sizes, explicitly assigning 19 inches to Large. The brand permits sizing down for a tighter fit or up for a looser fit (Old Bones Therapy knee-brace chart).
Old Bones Therapy product-line example
| Size | Circumference 4 in above top of kneecap |
|---|---|
| Youth | 13 in or less |
| Small | 13–15 in |
| Medium | 15–17 in |
| Large | 17–19 in |
| XL | 19–21 in |
| XXL | 21 in or more |
Because adjacent rows share endpoints, the boundary instruction matters. Under this chart, the explicit 19-inch example goes to Large rather than XL.
That rule conflicts with the cited DonJoy retailer and POD Active instructions to choose the larger size when between sizes. The difference cannot be resolved with a universal rule: each instruction belongs to its respective product line.
SBD knee sleeves: knee center plus a calf check
For SBD knee sleeves, measure with the leg straight and the muscles relaxed. Wrap the tape around the center of the kneecap and also measure the thickest part of the calf.
SBD says a wearer may consider one size larger when the calf is more than 1.6 inches larger than the knee. It also cautions new sleeve users to choose the recommended fit rather than automatically sizing down, especially at Medium or smaller (SBD knee-sleeve size guide).
SBD product-line example
| Size | Knee circumference |
|---|---|
| 3XS | 23–25.5 cm / 9–10 in |
| 2XS | 25.5–28 cm / 10–11 in |
| XS | 28–30.5 cm / 11–12 in |
| S | 30.5–33 cm / 12–13 in |
| M | 33–35.5 cm / 13–14 in |
| L | 35.5–38 cm / 14–15 in |
| XL | 38–40.5 cm / 15–16 in |
| 2XL | 40.5–43 cm / 16–17 in |
| 3XL | 43–45.5 cm / 17–17.9 in |
| 4XL | 45.5–48 cm / 17.9–18.9 in |
| 5XL | 48–51.5 cm / 18.9–20.3 in |
For example, a knee-center circumference of 36 cm falls in the SBD Large range. The calf measurement still matters because SBD provides its qualified calf-to-knee consideration.
These rules apply specifically to SBD knee sleeves. They do not establish a rule for another sleeve or for a hinged or rigid brace.
What to Do Between Sizes or When Measurements Disagree
A borderline result is not a reason to improvise. Work through the conflict in this order:
- Verify the exact model. Confirm that the chart belongs to the product and version you are buying.
- Repeat every measurement. Recheck the tape position, specified distances, and displayed value.
- Confirm the landmarks. Mid-patella, below the kneecap, above the kneecap, and the thickest part of the calf are not interchangeable.
- Confirm posture. Check whether the leg should be straight, relaxed, weight-bearing, or slightly bent.
- Check the unit. Do not enter inches into a centimeter chart or confuse centimeters with millimeters.
- Read the product’s boundary rule. Do not assume every brand wants the larger or smaller size.
- Escalate unresolved conflicts. Ask the manufacturer, authorized dealer, seller, or qualified fitter.
The documented rules genuinely differ:
- The cited DonJoy off-the-shelf retailer guide says to choose the larger size.
- POD Active says to choose the larger size.
- Old Bones Therapy says to size down.
Adjacent rows may share an endpoint. If one row ends at 19 inches and the next starts at 19 inches, the measurement alone does not reveal which row owns the boundary. Use the product’s explicit example or tie-breaking instruction.
When different body measurements point to different rows
Suppose the thigh indicates Medium, the knee indicates Large, and the calf indicates XL. The available general charts do not establish a universal hierarchy among those measurements.
Do not:
- Average the measurements
- Automatically choose the knee result
- Select the row containing two of the three values
- Assume the largest indicated size is always correct
- Substitute a rule from another brand
Instead, provide all measurements to the manufacturer, authorized dealer, seller, or qualified fitter and ask which dimension controls the exact model. A different model may sometimes be worth discussing when body proportions do not match a chart, but the available evidence does not establish a universal proportion threshold or model-selection rule.
If the two knees differ, record both sets of measurements. Retailer guidance may recommend using the larger measurement, but the exact product instructions should determine how asymmetry is handled.
For SBD sleeves only, a calf more than 1.6 inches larger than the knee may justify considering one size larger. Do not convert that qualified suggestion into a rule for other products.
Before ordering near a boundary, check the seller’s exchange options. Policies vary, so verify the applicable terms directly rather than assuming an exchange will be available.
How to Check the Fit After the Brace Arrives
A numerical chart is a starting point, not proof that the brace fits.
The target is a brace that feels comfortably snug and supportive without pinching, bunching, excessive pressure, or restricted circulation. It should remain in its intended position instead of sliding, rotating, or rolling (brace-fit guidance from OrthoBracing).
Follow the product’s fitting and strap sequence first. Then perform a short movement check:
- Stand and confirm that the hinges, opening, or alignment features sit where the instructions show.
- Walk briefly at a comfortable pace.
- Sit down and stand up.
- Straighten the leg comfortably.
- Bend the knee through an ordinary, comfortable range.
- Recheck alignment and pressure.
Look for:
- Downward slipping
- Rotation around the knee
- Rolling at the top or bottom
- Bunching over or behind the joint
- Pinching behind the knee
- Concentrated pressure from an edge, hinge, or strap
- Unwanted restriction of ordinary movement
- Any indication that circulation is being restricted
POD Active specifically says its brace should feel comfortably snug after walking and bending the leg. If the brace remains obviously misaligned or uncomfortable after the adjustments allowed by its instructions, contact the manufacturer, authorized dealer, qualified fitter, or seller about fit and exchange options.
A product chart or customer-support representative can address sizing and configuration.
When Online Sizing Is Not Enough
A size chart can help match measurements to a product. It cannot determine which brace is appropriate for an injury, diagnosis, or symptom pattern.
Seek model-specific fitting help when:
- Your thigh, knee, and calf measurements span multiple sizes.
- Your proportions do not match the chart.
- The brace repeatedly slips or rotates despite being fitted as directed.
- Hinges or other alignment features will not remain in position.
- The instructions are missing, unclear, or conflict with the seller’s chart.
- The product is custom rather than off-the-shelf.
- Permitted adjustments do not resolve an obviously poor fit.
POD Active recommends brace fitting and adjustment by a suitable healthcare provider or local dealer. For other products, the manufacturer or an authorized dealer can clarify which chart applies and how the model should be positioned.
Product support and medical assessment serve different purposes:
- A manufacturer, seller, dealer, or fitter can clarify size, configuration, and product instructions.
- A clinician can assess symptoms and determine whether a brace is appropriate.
Knee Pain Zone’s articles are general education, not medical treatment. Locking, giving way, or swelling after an injury warrants clinical attention rather than being treated as an ordinary sizing problem (Knee Pain Zone’s medical-information notice).
The concise rule is: use the exact product chart first, seek professional fitting when the measurements or fit remain unclear, and seek clinical assessment for warning signs.
Knee Brace Sizing FAQ
How do I know what size knee brace I need?
Identify the exact brand and model, then follow that product’s instructions for measurement location, posture, and unit. Repeat each measurement and compare it only with the current chart for that model.
Do not infer your size from another brace, even if both use labels such as Medium or Large. After purchase, check alignment, comfort, and stability during ordinary movement.
Should I size up or down if I am between knee-brace sizes?
Follow the exact product’s rule. There is no universal answer.
The cited DonJoy retailer guide and POD Active say to choose the larger size, while Old Bones Therapy tells users of its chart to size down. If the exact product provides no clear boundary rule, ask the manufacturer or seller instead of guessing.
Where do I measure my knee for a brace?
Measure at the location specified for the exact model. Depending on the product, that may be:
- Around the midpoint of the kneecap
- Directly beneath the kneecap
- At a fixed point above the kneecap
- At fixed points above and below knee center
- Across the width of the kneecap
The required posture can also vary. Confirm whether the leg should be straight, relaxed, weight-bearing, or slightly bent.
What if my thigh, knee, and calf measurements indicate different sizes?
Repeat the measurements and verify the landmarks, posture, and units. If the values still point to different rows, do not average them or invent a priority rule.
Give all measurements to the manufacturer, authorized dealer, seller, or qualified fitter and ask which dimension controls the exact model. Another model may sometimes be worth discussing when your proportions do not match the chart, but there is no universal threshold for making that change.
How tight should a knee brace feel?
It should feel comfortably snug and remain in its intended position without slipping, rotating, or rolling. It should not pinch, bunch, create excessive pressure, restrict ordinary comfortable movement, or interfere with circulation.
A fit that remains uncomfortable or unstable after the permitted adjustments requires product-specific help. Do not assume severe pressure is necessary for support.
Four Steps to the Right Knee-Brace Size
- Identify the exact brand and model.
- Measure at the locations and in the posture that product specifies.
- Follow that product’s own boundary or between-size rule.
- Test alignment and comfort during ordinary movement.
A knee brace size chart is a sizing aid—not a diagnosis, a universal conversion table, or a prescription for a particular brace. Direct unresolved measurement conflicts to the manufacturer or a qualified fitter, and direct injury warning signs or concerning symptoms to a clinician.